S
p
a
r
x
S
y
s
t
e
m
s
I
n
d
i
a

Contacts

No 58A, New No 73,
Thirumangalam Road,
Villivakkam,
Chennai-600 049

info@sparxsystems.in

Sparx Systems Enterprise Architect

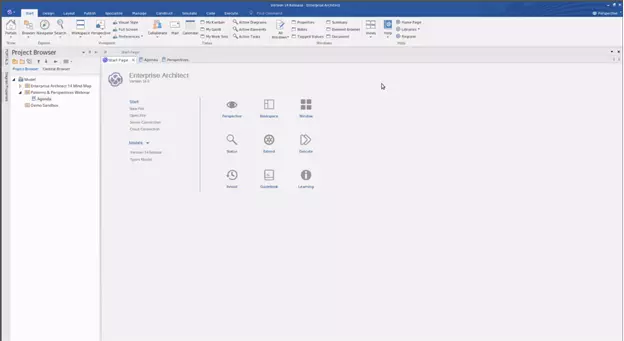
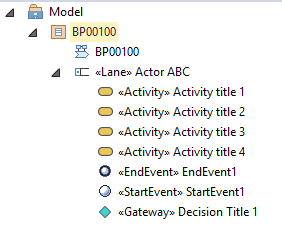
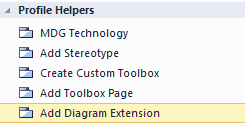
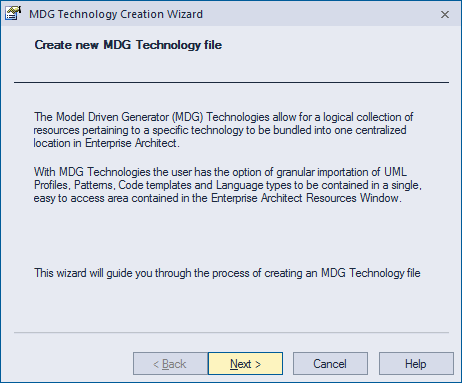
Diagram Legends in Project Browser

What is Diagram Legend?

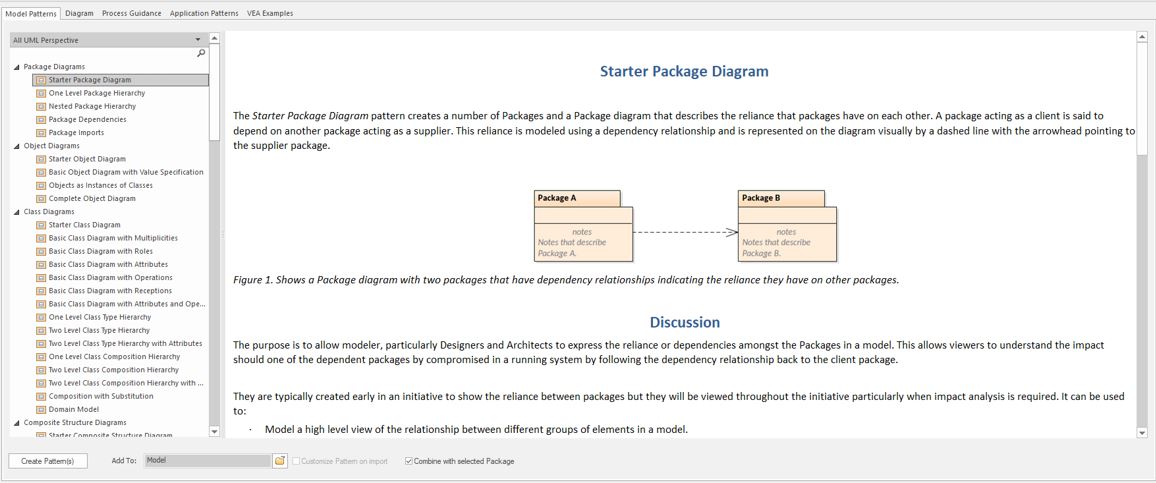
A Diagram Legend is an element that you can add to your diagram to provide information about the colours and/or line thicknesses and styles that have been used in the current diagram, where those colours and other styles have some particular meaning. For example, it is common to have a Legend that indicates a particular colour is indicative of a particular element’s status or version. Connectors might be coloured according to whether they are of a particular type or direction. Element borders might be thicker or thinner according to some other property or condition.

Picture 1 - Legends in Project Browser

Figure 1 Legend Icon & Artifact

Legends have additional capabilities, including the ability to auto colour elements in different ways and according to different rules and filters. Legends are classified as elements and will be listed in the Project Browser; however, they are not shown in contents of a Package displayed on a diagram.

Legend Presentation of a Digaram

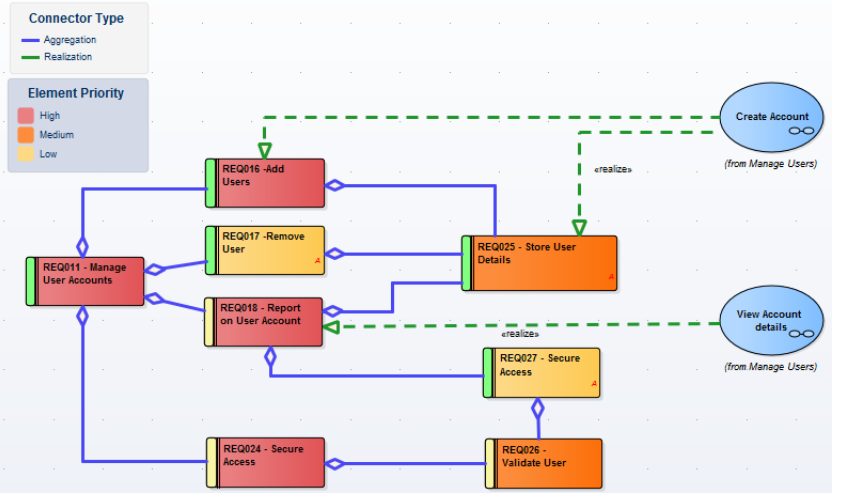
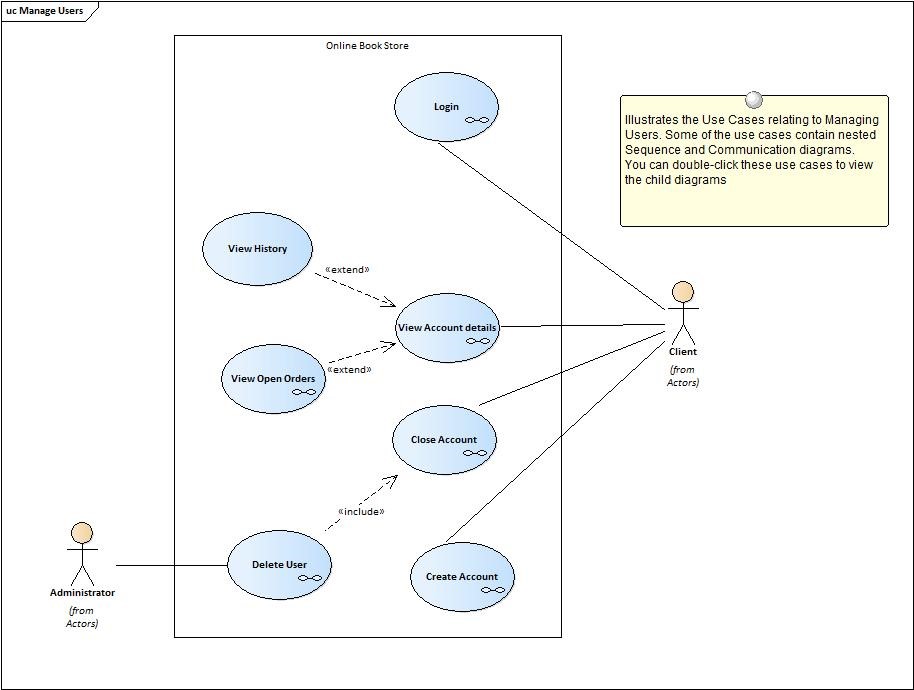
Figure 2 Legend Representation of a Diagram

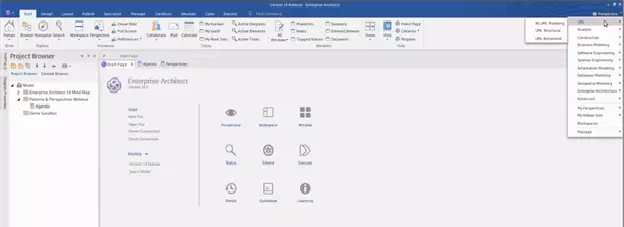
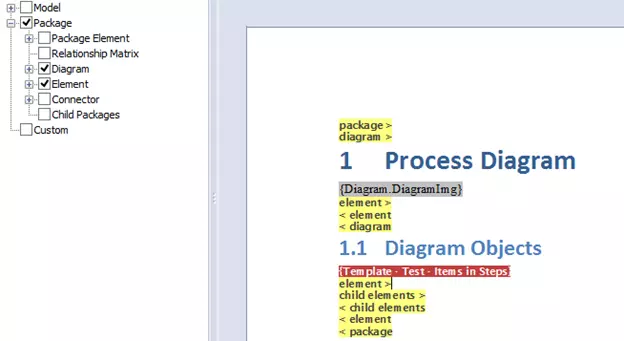
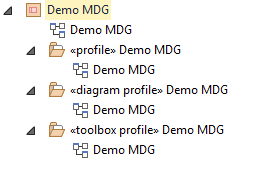
What’s new with Diagram Legend EA 14

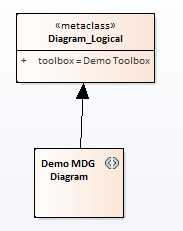
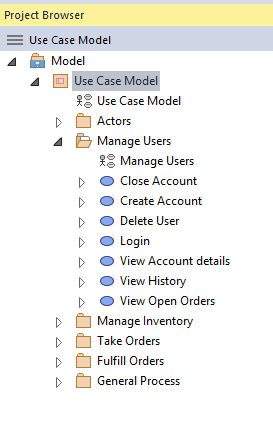
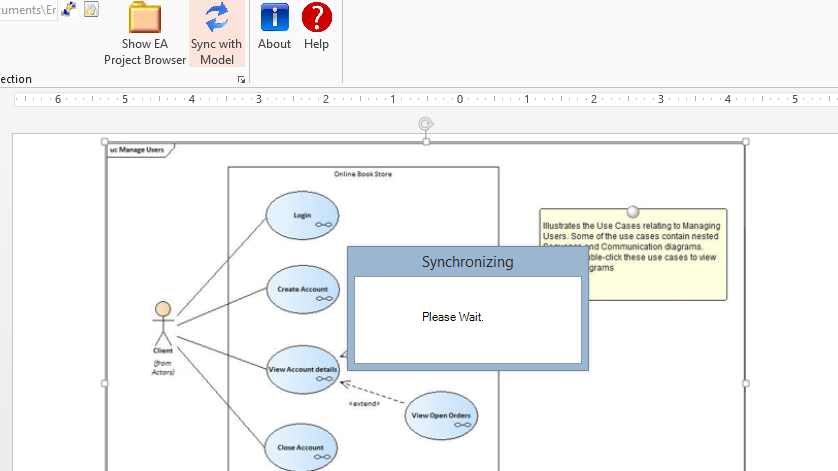
Diagram Legend in Enterprise Architect 14 follows the same concept with a simple but important change. Considerably in Enterprise Architect 13 creating a legend in a diagram or model will only reflect in the diagrams and not in the model project browser. However, this has been updated in the Enterprise Architect 14. When a Diagram Legend is created for a particular diagram. That legend artifact will remain under the respective package.

Picture 3 Legends in a Project Browser

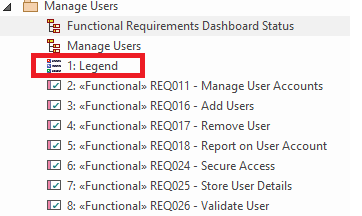
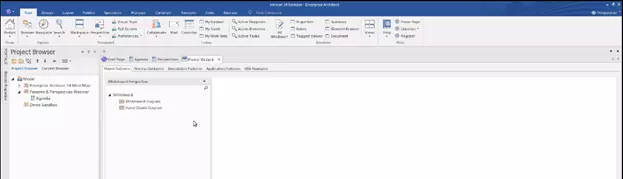
Figure 3 Legend in Project Browser
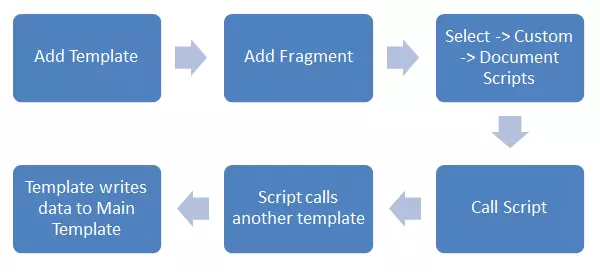
Creating a Legend

A Legend element on a diagram provides a visual key to the colours and line thicknesses you have used to identify elements and/or connectors that have a particular meaning. The Legend can reflect a simple, manually-applied convention such as all elements concerned with a management system being shaded in blue, or all outgoing connectors coloured red. However, the Auto-Colour Legends can also automatically apply the style to elements or connectors having a chosen property, such as a specific phase, stereotype or type.

The Legend lists the element appearance conventions first, and the connector appearance conventions underneath.

Picture - 4 Legend View

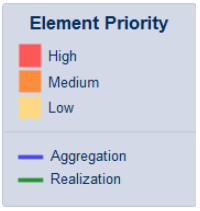
Figure 4 Legend View

To Access:

Drag the Diagram Legend icon from the Common page of the Toolbox onto the diagram.
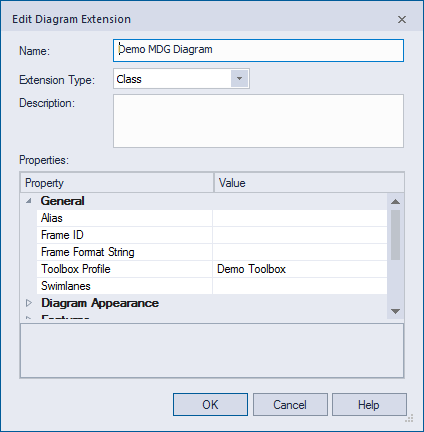
Legend Properties

The ‘Legend Properties’ define the appearance of the Legend element itself, such as its background colour, title text colour and size, and border colour. If you choose to use default colours, these are derived from the ‘Preferences’ dialog, ‘Standard Colours’ page.

To Access

Double-click Legend element | Style options

Option Action
Heading Size

Either:
Overtype the font size of the Legend Title text with a different value,                                                           or
Click on the ‘spinner’ arrows to increase or decrease the font size

Font Colour Click on the drop-down arrow and select one of the standard font colours for the Legend Title text.
If you want to use a non-standard colour, click on the Other button and either select from the larger pallet or define a custom colour.
Background Click on the down arrow and select one of the standard colours as the background fill colour of the Legend element.
If you want to use a non-standard colour, click on the Other button and either select from the larger pallet or define a custom colour.
Border Colour Click on the down arrow and select one of the standard colours as the colour of the borderlines of the Legend element.
If you want to use a non-standard colour, click on the Other button and either select from the larger pallet or define a custom colour.
Ok Button Click on this button to save your changes and close the dialog.
Cancel Button Click on this button to abandon any changes and close the dialog.

Further Information
Please contact us or write an email to info@sparxsystems.in to have a live demo of the new EA 16 features and capabilities.

Features in Sparx Enterprise ArchitectSparx Systems Enterprise Architect

New Perspective Window and Custom Perspective

  • Seriously overhauled to create rich, flexible and easily switched sets of related technologies.
  • Easy to focus the available model patterns, technologies, diagram types and to the precise set.
  • Avoid the significant “noise” that arises from having multiple technologies all competing for attention.
  • Hide complete Perspective sets or individual technologies using the new customization wizard.
  • Hiding a Perspective now only removes it as an available tool, while all diagrams that already make use of the hidden technology will still render and work as normal.
  • A new Perspective drop list coupled with the re-worked Portal bar provide a rapid and effortless mechanism for switching between technologies and swapping in and out the necessary tools at the right time.
  • For user convenience, selecting a Perspective set automatically brings up the modeling wizard, ready for inserting a rich set of new modeling patterns on which to build.
  • The Model Patterns Wizard and the new Diagram dialog also allow for swapping perspectives on the fly, making it easy to find and use the exact modeling tools required.
  • Out of the box, version 14 includes many Perspectives targeting Business, Software, Systems, Architecture, Project Management and more.
  • It has been built on the belief that is easier to rapidly switch between domain focused sets of tools on an as needs basis, than to provide a mixed set of technologies and tools that try to address ALL possible modeling scenarios.

Built-in Perspectives

Create a specific edition of the tool for a single discipline, language or framework. Switch perspectives to quickly change focus to another discipline. Intuitive groupings make it easy to find the right view

  • Domain and discipline focused view and tools.
  • Perspectives target disciplines such as: Business, Software, Systems, Architecture, Project Management and more.
  • Restricted set of diagrams and comfortably work with the required diagram.
  • Expertly created pattern available for each perspective.
  • Create any number of your own perspectives.

Customized Perspective

  • Create your own perspective Sets.
  • Along with the System Defined Perspective, user can now define and Implement their own Perspectives as per their requirement.
  • If you need a Perspective that combines BPMN and SysML for instance, you can do it with ease.

Sparx Systems Enterprise Architect

Rich Model Patterns for MDG Technologies

Model Pattern is one of the quite useful features in Enterprise Architect. Model patterns are often used by new modelers. Also very useful when developing a complex diagram from scratch. In Enterprise Architect Version 14 it has been enhanced further. The goal is to greatly enhance the modeling experience by making Enterprise Architect users to identify suitable patterns easily and to apply for a particular domain. The upgraded user interface has huge selection of model patterns with detailed guidance and references.

Patterns & Guidance

One of the featured highlights of Enterprise Architect 14 is the rich and highly detailed set of patterns and frameworks that have been incorporated into the Model Wizard. From basic modeling tasks, to Business, Systems, Architecture, Project Management and more, the new model patterns have solutions to kick start your design process.

In addition to the pattern itself, each selection includes a detailed set of notes, references, advice and graphics depicting the pattern as initially created. Getting started with a particular modeling view or task is now so simplified and focused that it is much easier to get the right tools in place to quickly and effectively understand how to best maximize the value of a particular pattern. It almost includes more than 1000 new patterns.

sparx india

Each pattern includes

  • A model fragment targeting a specific use
  • Package structure (where appropriate)
  • Detailed notes and discussion material on usage
  • Detailed links to help material and other resources related to the pattern
  • XMI based implementation for quick and easy insertion of the pattern into the current model

Patterns come in many forms

  • Simple starter patterns.
  • Diagram includes basic elements.
  • Complex multi-level examples (e.g. Collaborations).
  • Package structure or model outline (generally for various Frameworks).
  • Case Studies, Worked out examples of modeling techniques and usage.
  • Simple step wise diagrams, illustrating how to achieve specific goals.


Uncategorized

Enterprise Architect 14 Perspective and Model Patterns Overview

This article will give an overview about Modelling Intent and Diagram features of Enterprise Architect 14 specifically new perspectives combined with impressive array of new model patterns which makes modelling efforts more productive in Enterprise Architect 14.

Enterprise Architect 14

Perspective:

The Enhanced Perspective option in Enterprise Architect 14 is one of the options most beginners who look for in Sparx Enterprise Architect.  Set of modeling technologies will be shown based on user selected perspective. This keeps the Pattern selection, Diagram toolbox, Stereotype selection and new diagram windows minimal. This is one of the most expected features in upcoming release of Sparx Enterprise Architect 14.

Perspective

Pattern selection:

Setting the perspective to Whiteboard displays set of patterns available for whiteboard. This defeats MDG configuration in Sparx Enterprise Architect 13.5 and previous versions

Pattern selection

Diagram toolbox:

Setting the perspective brings the toolboxes relevant to technology selected in the perspective. In the below diagram User has selected BPMN perspective. On click of more tools icon displays toolboxes relevant to BPMN

Diagram toolbox

Stereotype selection:

Perspective not only reduces the options in patterns and diagram toolbox but also in stereotype selection option in an element. Setting perspective displays minimal set of profiles on stereotype selection window. In the below screenshot the profiles are listed in the dropdown based on the perspective selection

Stereotype selection

New diagram:

Perspective also affects new diagram selection option in Enterprise Architect 14. Adding a new diagram in Enterprise Architect 14 display minimal diagram types if any perspective set. In the below image BPMN and mind mapping diagrams are shown based on selected BPMN perspective

New diagram

Model Patterns:

Model Patterns

Enterprise Architect 14 Model Pattern looks very impressive than all its previous versions. The patterns listed in Model pattern window based on selected perspective. Also in Enterprise Architect 14 model pattern gives a brief note along with help files for each pattern.

Upcoming Webinars in Enterprise Architect 14

Click on this link to know more about upcoming webinars in Enterprise Architect 14.

For Assistance please drop a mail to info@sparxsystems.in

Please drop your queries in the comment box below.

Document GenerationEA AutomationSparx Systems Enterprise Architect

Generating Documents using Document Scripts in Enterprise Architect

Sparx Systems Enterprise Architect is one of the very few tools that have the capability to generate documents on go from a centralized repository. Enterprise Architect has features to customize document contents using user templates, fragments, style sheets, cover pages and headers, and footers.

  • Document Script in fragments is a new option that is introduced in Enterprise Architect 13.
  • Used generally for generating complex documents from Enterprise Architect.

Custom Script vs Document Script

  • Custom script (Introduced in EA 11): Script returns a value that can be used in the fragment using the ‘custom’ field.
  • Document script (Introduced in EA 13): A combination of scripts and templates. The script calls another Template and passes the ID of an object to be reported

How does Document Script work?

1

Advantages of Document Script:

  • Flexibility in reporting desired fields in the desired order
  • Loop through or mix and match details in a custom way, as per the requirements.
  • Removes the need to write an external add-in to generate custom documents from the model.

Steps to create Document using Document Scripts:

2

  • From the Above business process diagram, we are going to generate all the diagram objects from the parent package.
  • Initially have created a Template like the below with package and element section enabled.

3

  • Under the Diagram Objects heading have inserted a new fragment and inside the fragment have enabled the Custom Section as below

4

  • To create a document script Fragment -> Document Options ->Custom Query -> Document Script and in the dropdown select the script which is written for document generation.

5

  • Reference the ID of the element or Package currently being processed by the document template, using the #OBJECTID# or #PACKAGEID#
  • Process Package script does the magic of rendering the objects in an order to a document.
  • Script which needs to be used in the Document script should always return an RTF

      var docGenerator as EA.DocumentGenerator;

        docGenerator = Repository.CreateDocumentGenerator();

        if ( docGenerator.NewDocument(“”) )

        { 

            docGenerator.DocumentElement(ElementID,Heading Depth,”templateName”); // Used to add the element details in rtf

             var rtf = docGenerator.GetDocumentAsRTF();

            return rtf;

       }

  • For more details on attributes and methods of DocumentGenerator class please refer to Sparx Help on Document Generator class
  • In the document script, a template should be referred to so that the data will be formatted and printed based on that template.
  • For e.g. From the below package structure in Enterprise Architect

6

  • If the documentation is generated at the package level (BP00100) and the script for rendering all the diagram objects of a diagram
  • We need to pass the packageID as the parameter in the document script.
  • In the script, the main function rtf should be returned

function main(packageID)

{

var docGenerator as EA.DocumentGenerator;

docGenerator = Repository.CreateDocumentGenerator();

if ( docGenerator.NewDocument(“”) )

{

try

{

var package as EA.Package;

package = Repository.GetPackageByID(packageID);

var diagram as EA.Diagram;

diagram = package.Diagrams.GetAt(0);

var diagramObjects as EA.Collection;

diagramObjects = diagram.DiagramObjects;

for ( var i = 0 ; i < diagramObjects.Count ; i++ ) {

var diagramObject as EA.DiagramObject;

diagramObject = diagramObjects.GetAt( i );

var currentElement as EA.Element;

currentElement = Repository.GetElementByID(diagramObject.ElementID);

if(currentElement.Type != “Note” && currentElement.Type != “ActivityPartition” && currentElement.Type != “Pool” && currentElement.Type != “Lane”)

docGenerator.DocumentElement(currentElement.ElementID,1,ACTIVITY_TEMPLATE);

}

}

catch(e)

{

Session.Output(e);

}

var rtf = docGenerator.GetDocumentAsRTF();

return rtf;

}

return “”;

}

  • Templates inside the script can be mentioned as below

var ACTIVITY_TEMPLATE = “Activity_Report”;

Conclusion:

  • The above described is an example of generating a document using a document script. You can download this entire sample model with document generation scripts and templates from https://sparxsystems.in/Downloads/DocumentScriptTest.eap
  • Any complex logic can be used in the script but finally, it should return an RTF. 

Further Information
Please contact us or write an email to info@sparxsystems.in to have a live demo of the new EA 16 features and capabilities.

Sparx Systems Enterprise Architect

How to define MDG Technologies in Enterprise Architect

Model-Driven Generation Technologies allow users to extend Enterprise Architect’s modelling capabilities to specific domains and notations. MDG Technologies seamlessly plug into Enterprise Architect to provide additional customized toolboxes, UML profiles, patterns, templates and other modelling resources.

Enterprise Architect also has some built-in technologies which may vary based on the edition of Enterprise Architect.

To create a custom MDG using Model Wizard:

1. Create new or open existing Enterprise Architect files.

2. Open Model Wizard and select Frameworks | Simple Template from the Model Wizard dialogue.

3. Add a Technology Name.

Adding a technology

4. By selecting the simple template from Model Wizard, a simple package structure (For Defining MDG Technology) will be auto-created.

Define MDG Technology

To create an MDG technology, some basic steps need to be performed in the below order:

  • Create Profile elements
  • Create diagram profile
  • Create toolbox profile

And below are other optional items that can be added to MDG Technology.

To Create a Profile Elements

To Create Profile Elements

  • All the custom objects and connectors that need to be added in the MDG Technology should be added under this package.
  • All the element or connectors which needs to be created should have a metaclass definition.
  • To add a metaclass, choose the diagram under the <<profile>> stereotyped package and enable the toolbox of it.

  • Drag and drop the Metaclass object from the toolbox and select the type of object from which the new object is extending.

  • Can also create multiple stereotype elements from a single metaclass element.
  • Once the Meta class is created, need to add a Stereotype object from the toolbox and need to add an extended connector between the Meta class and stereotype element.

  • Select stereotype element | Edit with profile helper to customize the effect of stereotype properties.

Select Stereotype

In General Tab: Name and Metatype sections are mandatory.

  • In our case the name is Rule and the same should be filled in the Metatype.
  • The stereotype of this class object will be “Rule”.

In the Tagged Values Tab:

  • All the tagged values that need to be added to the object can be created here.
  • Existing tagged values can also be added here by selecting Predefined list.

In Shape Script Tab:

  • Shape Scripts are used to extend the shapes and styles of the standard objects to create new styles.

To Create Toolbox Profile

  • All the objects that are created under profile stereotype packages should be added to the toolbox page so that it will get displayed in the created MDG technology.
  • To add a toolbox page, drag and drop the Add Toolbox Page object from the toolbox to the diagram under the <<toolbox profile>> package.

  • In Add Toolbox Page, provide the Name, tooltip, and icon and finally need to add the items (elements/Connectors) for the respective toolboxes.

  • Added items will be displayed in the toolbox items section and need to give the alias for all the items added in the toolbox as below.

  • And the toolbox items will be displayed like below in the diagram and it will have connected with a metaclass toolbox page

To Create a Diagram Profile

 A diagram profile can be linked to a Toolbox Profile that will provide quick access to these modelling constructs for rapid development.

  • To add a diagram extension, need to drag-drop Add Diagram Extension object from the toolbox to the diagram under the <<diagram profile>> stereotyped package.

  • Name, Extension Type (from which extension) Alias, Toolbox profile Name needs to be filled
  • Toolbox profile property helps to auto open the toolbox while using this diagram type.
    • The value of the Toolbox profile should be the same as the Toolbox name which we defined.

  • After creating the diagram extension will be added with a metaclass connected to it like below.

To Export XMLs for Generating MDG Technology.

  • Each packages profile, diagram and toolbox should be saved as a UML profile separately.
  • To save as a profile right-click the package -> Advanced -> save the package as a UML profile.
  • A unique name should be maintained for each package as these need to be identified and selected at the time of MDG creation.

Generate MDG technology

  • To generate an MDG technology file, select the “Publish | Generate MDG Technology File” menu from the ‘Publish’ Tab and fill the details in “MDG Technology Creation Wizard” and finish it which creates an MDG technology file.

1.  Select “MDG Technology Creation Wizard”. Select “Next”.

2. Select to create a new MTS file and proceed with the Next click.

3.  Browse a path and save it as.MTS file. click Next.

4.   Define filename to save technology file as .xml, ID, Version and Notes.

Select Next to proceed further.

OPTIONACTION
TechnologyType the name of the MDG Technology.
Filename

Type or select the path and filename of the MDG Technology File.

The file extension for this file is .xml.

IDType a unique reference for the MDG Technology File, up to 12 characters long
VersionType the version number of the MDG Technology File.
Icon(Optional) Type or select the path and file name of the graphics file containing the technology icon(16×16 bitmap).
Logo(Optional) Type or select the path and file name of the graphics file containing the technology logo(64×64 bitmap).
URL(Optional) If you have any website product information type or paste the URL in this field.
Support(Optional) If you have any web-based or other support facility type or paste the contact address in this field.
NotesType a short explanation of the functionality of the MDG Technology.


5. Select the checkbox for each item to be included in the MDG Technology file. When you have selected the checkboxes for all the items you want to include, click on the Next button.Each selection runs specific dialogues to enable the definition of the specific items to be included in the MDG Technology.

6. Locate Profile xml. which was created for each package (profile, diagram and toolbox) and it will display all the UML profiles under the selected folder and it that need to select the profile UML alone

  • And similarly need to select the profiles for the toolbox and diagram

7. Locate diagram xml. select the needed definition and select Next.

8.  Locate Toolbox xml. select the needed definition and select Next.

9.   Select Next and Finish.

10.   MDG Technology successfully created.

To Import MDG Technology

  • From Ribbon , Public Tab -> Publish ( Resource Section ) -> Import MDG Technology.

  • Once imported, the added technology will be displayed in MDG Technologies.
  • Go to Configure ->Manage ( Technology section ).

To Update MDG Toolbox

  • Do Changes in the MDG Profile .eap file and regenerate all the steps defined in “Generate MDG Technology”
  • When creating an MDG file in the final step instead of Creating a New MTS file need to choose Open an existing MTS file and need to select the existing MTS file and update the information in it. For each update in MDG, it’s good to update the version of it.

Further Information
Please contact us or write an email to info@sparxsystems.in to have a live demo of the new EA 16 features and capabilities.

Uncategorized

Enterprise Architect 14 Preview

Hello Enterprise Architect Users, Sparx Systems is planning to launch Enterprise Architect 14 this year. As usual the whole community is looking for

  • What is new in Enterprise Architect 14?
  • Is there something cool that would benefit us?
  • When will Enterprise Architect version 14 be released?
  • Will there a beta release?

These all are some questions that pops up in everyone minds. That’s why Sparx Systems India team came with Enterprise Architect 14 preview article to answer your questions. The new version is expected to launch before March 2018. Yes there will be a beta release beforehand.

Cool features for Enterprise Architect Users:

  • Enhancement in perspective
  • Simplified Toolbox without configuring technologies
  • Simplified Stereotype selection
  • Display list of relevant diagram types on diagram creation based on selected perspective
  • Context Browser Focuses on specific package

Other exciting features in Enterprise Architect 14:

  • Inline Reader similar to specification window
  • Advanced Property window now handles (elements, diagrams & connectors & Tagged Values)
  • Pro-cloud Server enhancements
  • Business Process & Simulation
    • Now support to model Decision Modeling Notation
    • Enhanced process simulation

Recorded Webinar – Introducing Enterprise Architect 14

Enterprise Architect 14 is a major milestone release! Ahead of the official launch, we’re providing a new webinar series focused exclusively on previewing the version 14 release.

In this first webinar, we provide an overview of version 14 and show you why Enterprise Architect 14 will make your modeling experience better than ever!

In this webinar:

  • Find out the major release items in Enterprise Architect 14
  • Understand how version 14 addresses your modeling intent
  • Prepare to apply the new toolset before official launch!

Recorded Webinar – Introducing Enterprise Architect 14 – Enhanced Model Editing

The Model Wizard has been available in Enterprise Architect for many years, but in version 14 it has received a huge update. The goal of these changes has been to greatly enhance the modeling experience and to make it much easier to find and use the right modeling approach for a particular domain and purpose.

In this webinar, we preview the new Model Wizard and its huge selection of model patterns that come with detailed guidance and references, perspective-based filtering and use of meta-model driven views that combine to vastly improve the modeling experience.

In this webinar:

  • Preview the new Model Wizard interface
  • Understand the range of built-in Model Patterns
  • Apply new model patterns & perspectives to kick-start your projects

Recorded Webinar – Introducing Enterprise Architect 14 – Model Patterns & Perspectives

Explore the Mind Map of the Version 14 Release

Enterprise Architect 14 is a major milestone release! Ahead of the official launch, we’re providing a new webinar series focused exclusively on previewing the version 14 release.

In this webinar:

We provide an overview of version 14 and show you why Enterprise Architect 14 will make your modeling experience better than ever!

  • Preview the new Model Wizard interface
  • Understand the range of built-in Model Patterns
  • Apply new model patterns & perspectives to kick-start your projects

Upcoming Webinars in Enterprise Architect 14

Click on this link to know more about upcoming webinars in Enterprise Architect 14.

IntegrationsSparx Systems Enterprise Architect

Publish model contents to PowerPoint presentations

PowerPoint integration provides easy access to Enterprise Architect’s model within PowerPoint presentations. Insert diagrams and elements from the Enterprise Architect model in PowerPoint slides with references. These diagrams and elements can be synchronized anytime to reflect the latest snapshot from the model!

Prerequisites

  • MDG Integration for Microsoft Office

Key Features

  • Insert Packages, Elements, and Diagrams details directly from the Enterprise Architect repository by double-clicking or drag and drop.
  • Ensure the presentation stays current with the latest model from Enterprise Architect.

Functions

  • Packages, Elements, and Diagram names can be inserted.
  • Child Packages and Child Elements details can be inserted in a table format.
  • Relationship details can be inserted in a table format.
  • Diagrams can be inserted.

To publish content in PowerPoint

1. After the installation of MDG Office Integration ( Inbuilt with EA Ultimate Edition ), Open a PowerPoint presentation and you can find a new ribbon named Enterprise Architect as shown below

Image -Power point Presentation

2. Connect to an Enterprise Architect model – Both EAP files and database models can be selected. (If the model contains security, then the Enterprise Architect login credential’s dialog will be shown)

3. After successfully connecting to the Enterprise Architect repository, Enterprise Architect’s Project Browser will be displayed in the Powerpoint as below with the connected repository objects.

Image 2 Use Case Model in Project Browser

4. Objects can be easily inserted into Powerpoint by Dragging and Dropping or by Double Clicking the elements from the project browser.

  • Insert options may differ based on the items.
  • For Packages, it will display as below.

For example, if we double click the Manage Users package and selected Text, then the output will be like below

Figure 3 - Manage Users Package

Figure 4 Manage Users

  • Text – Drop the Package Name as Text
  • Details In Table – Drops the details of child elements in table format

For example, if we double click the Manage Users package and select details in the table, then the output will be like below

Figure 5 - Select type - Manage Users

Figure 6 - Login Creation

  • Include Sub Package – If checked, will add all child packages recursively.
  • Include Sub Elements – If checked, will add all child elements recursively.
  • Relationships – Drop the links of the selected package in table format.

C.     For Elements, the below wizard will be displayed.

Figure 7 Include Sub Package Sub elements

  • Text – Drop the Element Name as Text
  • Details In Table – Drops the details of its child elements in table format

For example, if we double click the Login from Manage Users package and select details in the table, then the output will be like the below.

Figure 8 Output window for Login from manage Users Package

Figure 9 - Window

  • Include Sub Package – Will be disabled ( Package won’t exist under an Element )
  • Include Sub Element – If checked, will allow dumping all the child elements recursively.
  • Relationships – Drop the link details of the selected element in table format

For example, if we double click the Login from the Manage Users package and select relationships, then the output will be like below

Figure 10 Select type - Relationships

Figure 11 -

d. For Diagrams, the below wizard will be displayed

Figure 13

  • Text – Drop the Diagram Name as Text
  • Diagram Image – Add a Diagram image to the slide.

For example, if we double click the Manage Users diagram from Manage Users and select the diagram image, then the output will be like below

Figure 15

  • Relationships – Used to drop the link details of the selected element in table format. It will list all the elements that are connected with the selected element.

Synchronization:

  • All the Items which are inserted from the repository can be updated in PowerPoint using a single click (Sync with Model).
  • In the Below diagram, have inserted the Package name and diagram into PowerPoint from the EAExample repository.

Sample Diagram: (Before Sync)

Figure 16

Sample Package Contents: (Before Sync)

Figure 17

  • In the future, if the details in the repository have changed, those changes can be synchronized in PowerPoint by just connecting the repository.

For example, in the diagram repositioned all the objects and in the table, contents have added alias for all the objects in enterprise architect. After all the changes in EA, I just connected the model in PowerPoint and used Sync with Model option and the sync will be started (refer below diagram).

Figure 18

  • After the items get synchronized, the PowerPoint contents will be updated with the details from the latest repository.

Sample Diagram: (After Sync)

Figure 19

Sample Package Contents: (After Sync)

Figure 20

Further Information
Please contact us or write an email to info@sparxsystems.in to have a live demo of the new EA 16 features and capabilities.

1345