


How to define MDG Technologies in Enterprise Architect
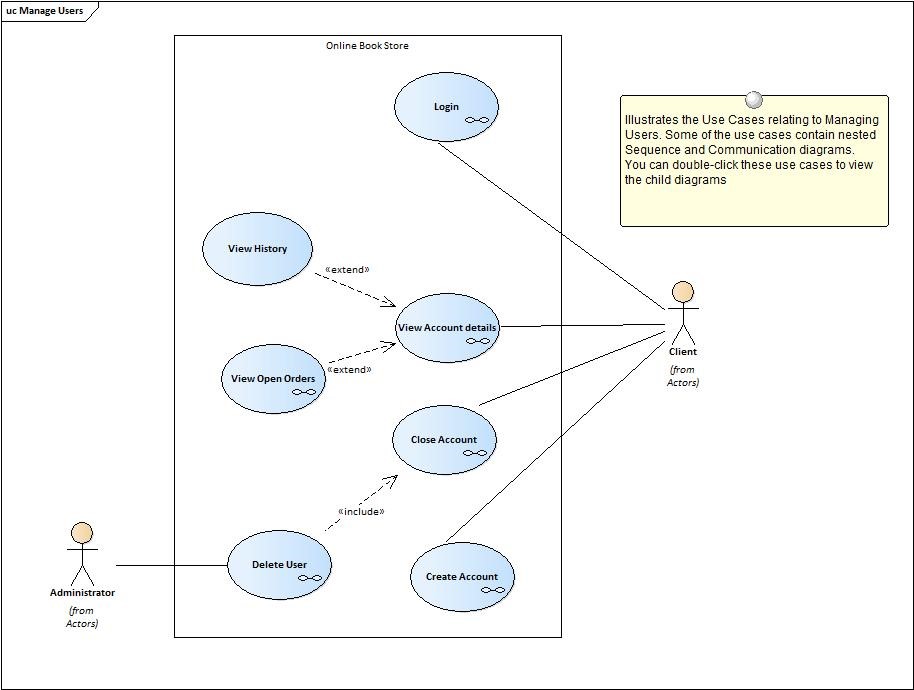
Model-Driven Generation Technologies allow users to extend Enterprise Architect’s modelling capabilities to specific domains and notations. MDG Technologies seamlessly plug into Enterprise Architect to provide additional customized toolboxes, UML profiles, patterns, templates and other modelling resources.
Enterprise Architect also has some built-in technologies which may vary based on the edition of Enterprise Architect.
To create a custom MDG using Model Wizard:
1. Create new or open existing Enterprise Architect files.
2. Open Model Wizard and select Frameworks | Simple Template from the Model Wizard dialogue.
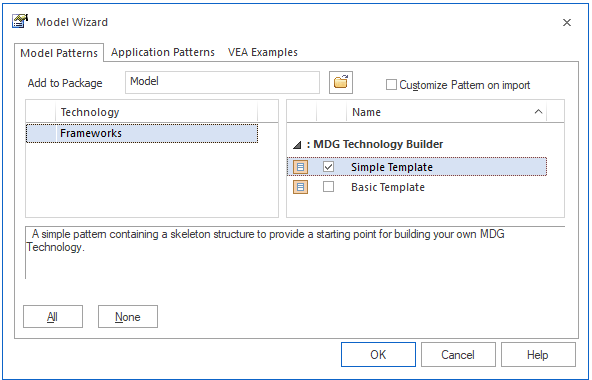
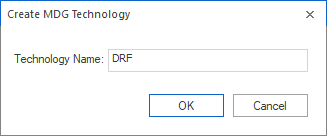
3. Add a Technology Name.
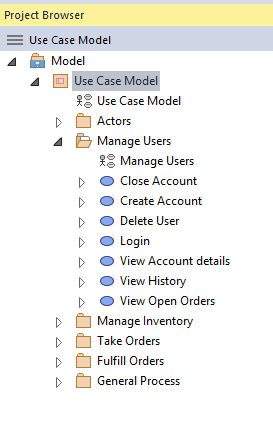
4. By selecting the simple template from Model Wizard, a simple package structure (For Defining MDG Technology) will be auto-created.
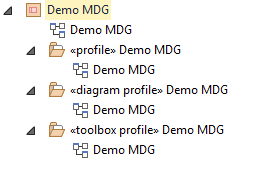
Define MDG Technology
To create an MDG technology, some basic steps need to be performed in the below order:
- Create Profile elements
- Create diagram profile
- Create toolbox profile
And below are other optional items that can be added to MDG Technology.
To Create Profile Elements
- All the custom objects and connectors that need to be added in the MDG Technology should be added under this package.
- All the element or connectors which needs to be created should have a metaclass definition.
- To add a metaclass, choose the diagram under the <<profile>> stereotyped package and enable the toolbox of it.
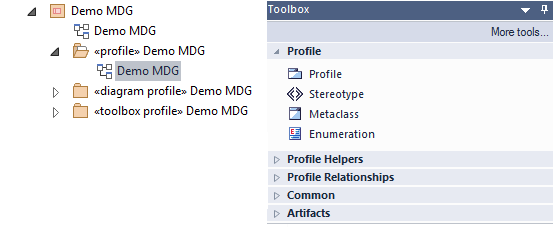
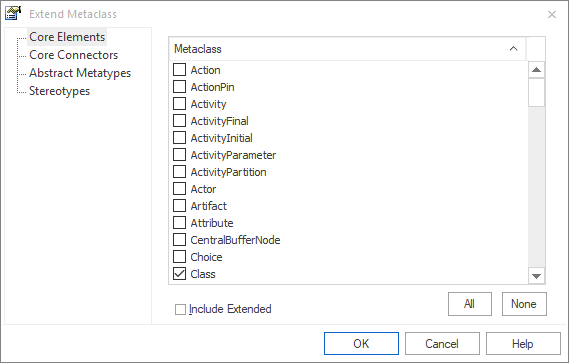
- Drag and drop the Metaclass object from the toolbox and select the type of object from which the new object is extending.
- Can also create multiple stereotype elements from a single metaclass element.
- Once the Meta class is created, need to add a Stereotype object from the toolbox and need to add an extended connector between the Meta class and stereotype element.
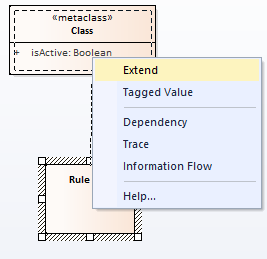
- Select stereotype element | Edit with profile helper to customize the effect of stereotype properties.

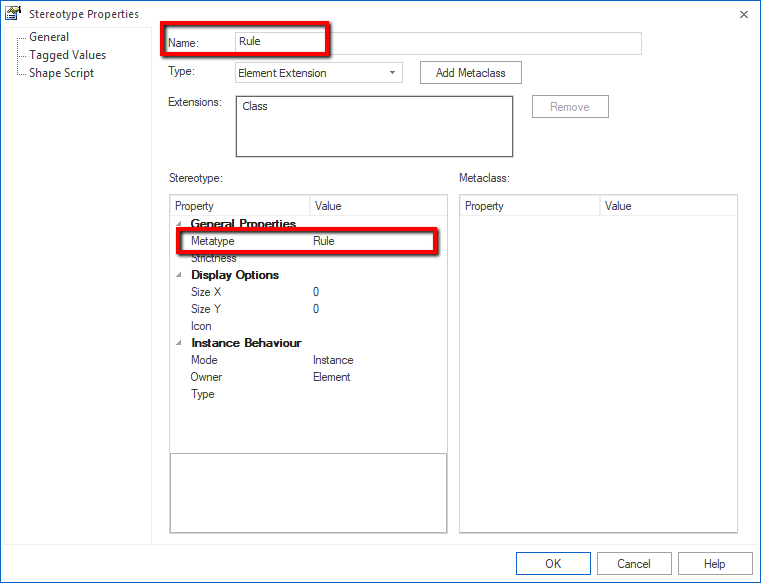
In General Tab: Name and Metatype sections are mandatory.
- In our case the name is Rule and the same should be filled in the Metatype.
- The stereotype of this class object will be “Rule”.
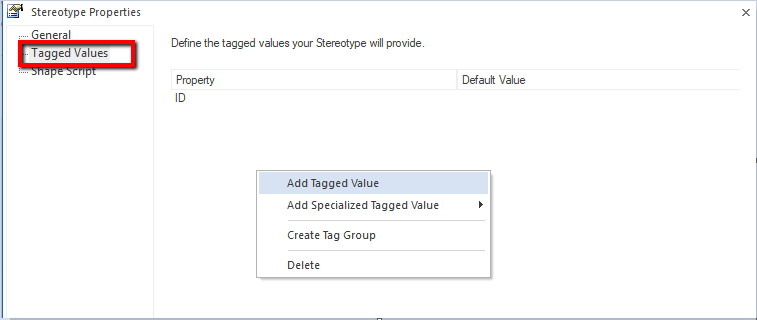
In the Tagged Values Tab:
- All the tagged values that need to be added to the object can be created here.
- Existing tagged values can also be added here by selecting Predefined list.
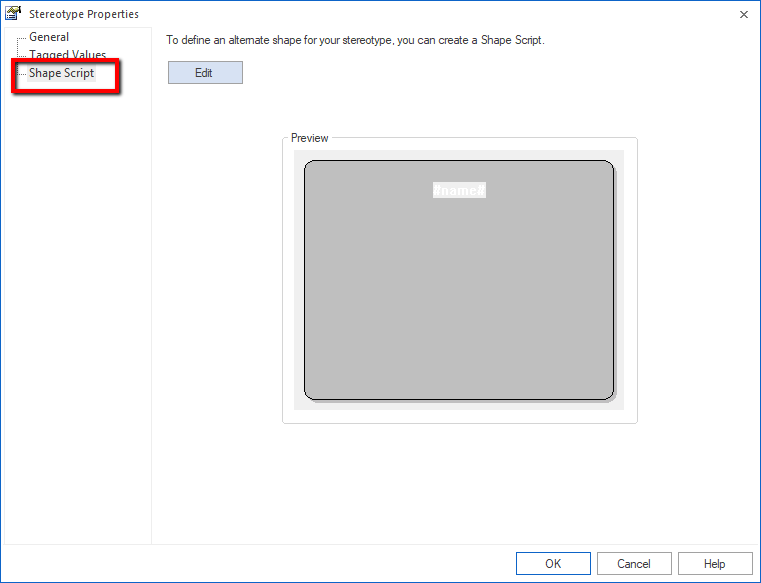
In Shape Script Tab:
- Shape Scripts are used to extend the shapes and styles of the standard objects to create new styles.
To Create Toolbox Profile
- All the objects that are created under profile stereotype packages should be added to the toolbox page so that it will get displayed in the created MDG technology.
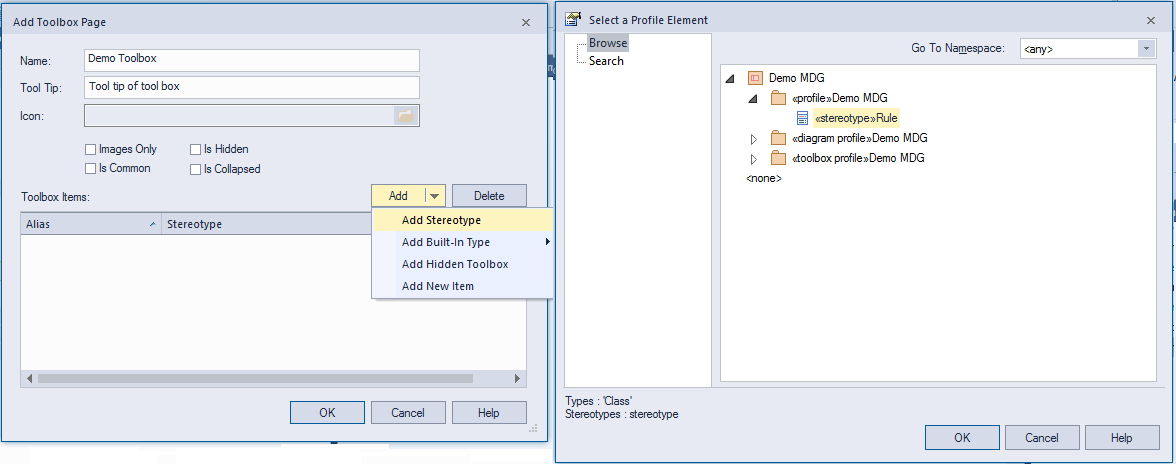
- To add a toolbox page, drag and drop the Add Toolbox Page object from the toolbox to the diagram under the <<toolbox profile>> package.
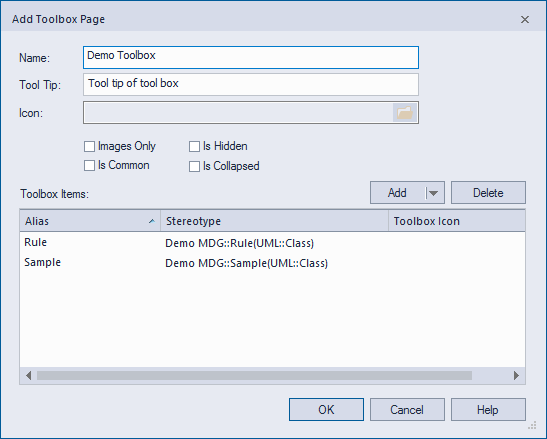
- In Add Toolbox Page, provide the Name, tooltip, and icon and finally need to add the items (elements/Connectors) for the respective toolboxes.
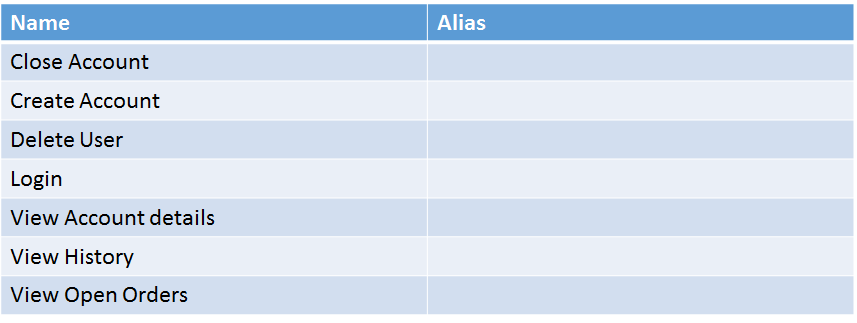
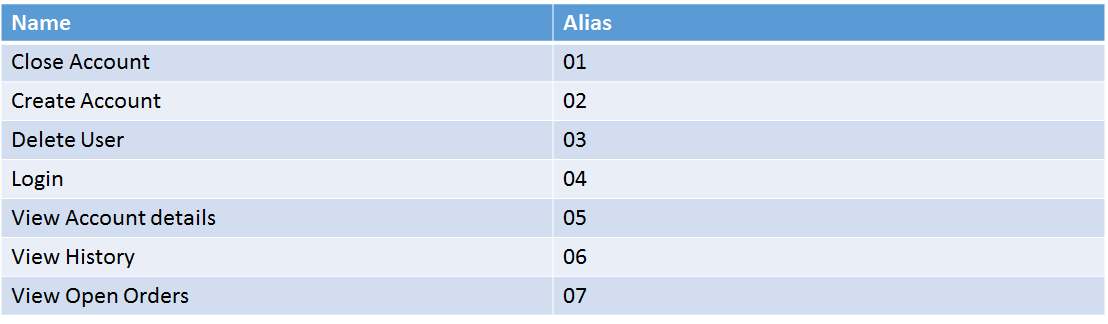
- Added items will be displayed in the toolbox items section and need to give the alias for all the items added in the toolbox as below.
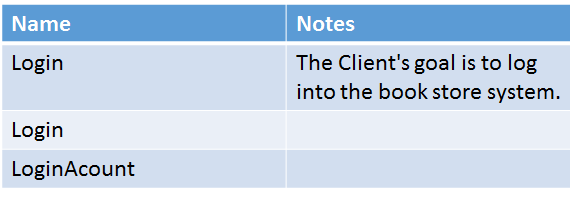
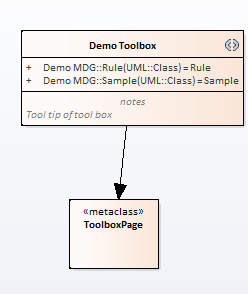
- And the toolbox items will be displayed like below in the diagram and it will have connected with a metaclass toolbox page
To Create a Diagram Profile
A diagram profile can be linked to a Toolbox Profile that will provide quick access to these modelling constructs for rapid development.
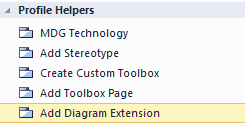
- To add a diagram extension, need to drag-drop Add Diagram Extension object from the toolbox to the diagram under the <<diagram profile>> stereotyped package.
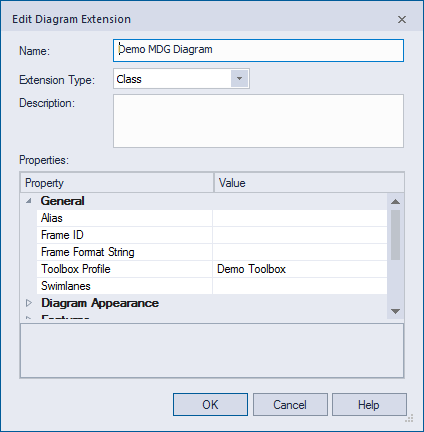
- Name, Extension Type (from which extension) Alias, Toolbox profile Name needs to be filled
- Toolbox profile property helps to auto open the toolbox while using this diagram type.
- The value of the Toolbox profile should be the same as the Toolbox name which we defined.
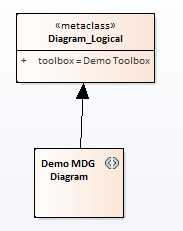
- After creating the diagram extension will be added with a metaclass connected to it like below.
To Export XMLs for Generating MDG Technology.
- Each packages profile, diagram and toolbox should be saved as a UML profile separately.
- To save as a profile right-click the package -> Advanced -> save the package as a UML profile.
- A unique name should be maintained for each package as these need to be identified and selected at the time of MDG creation.
Generate MDG technology
- To generate an MDG technology file, select the “Publish | Generate MDG Technology File” menu from the ‘Publish’ Tab and fill the details in “MDG Technology Creation Wizard” and finish it which creates an MDG technology file.
1. Select “MDG Technology Creation Wizard”. Select “Next”.
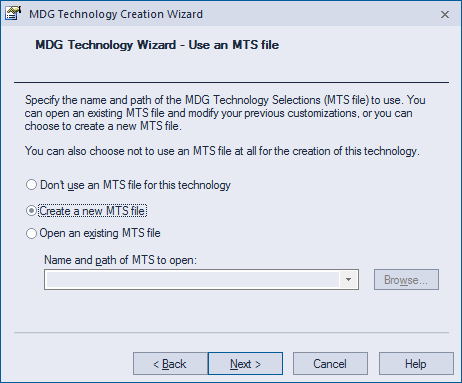
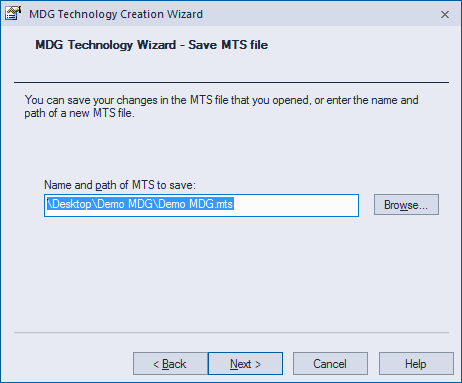
2. Select to create a new MTS file and proceed with the Next click.

3. Browse a path and save it as.MTS file. click Next.
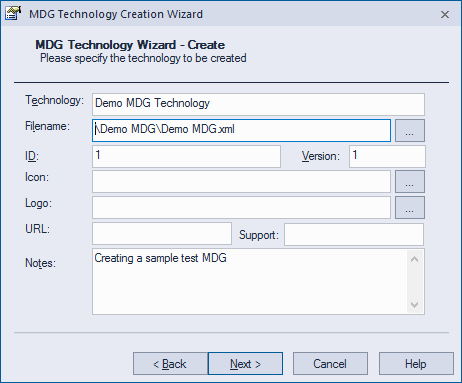
4. Define filename to save technology file as .xml, ID, Version and Notes.
Select Next to proceed further.
| OPTION | ACTION |
| Technology | Type the name of the MDG Technology. |
| Filename | Type or select the path and filename of the MDG Technology File. The file extension for this file is .xml. |
| ID | Type a unique reference for the MDG Technology File, up to 12 characters long |
| Version | Type the version number of the MDG Technology File. |
| Icon | (Optional) Type or select the path and file name of the graphics file containing the technology icon(16×16 bitmap). |
| Logo | (Optional) Type or select the path and file name of the graphics file containing the technology logo(64×64 bitmap). |
| URL | (Optional) If you have any website product information type or paste the URL in this field. |
| Support | (Optional) If you have any web-based or other support facility type or paste the contact address in this field. |
| Notes | Type a short explanation of the functionality of the MDG Technology. |
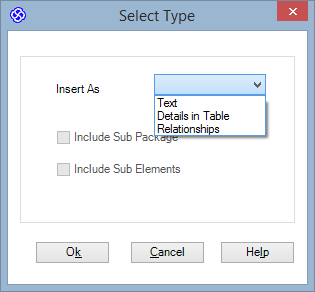
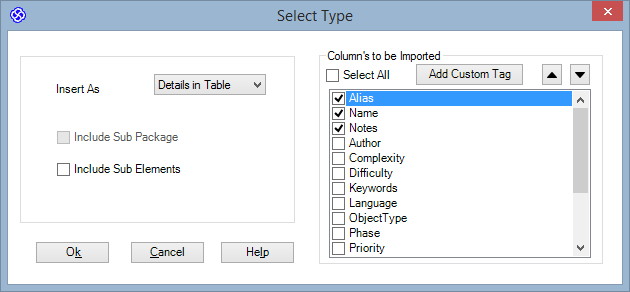
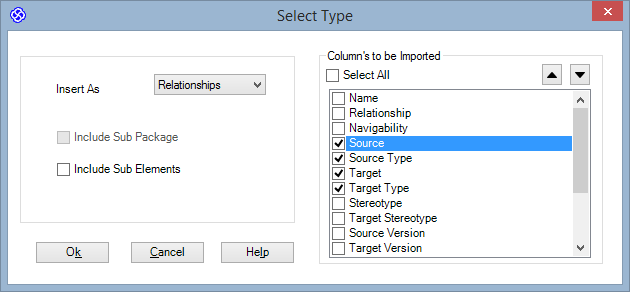
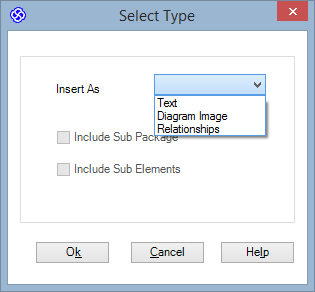
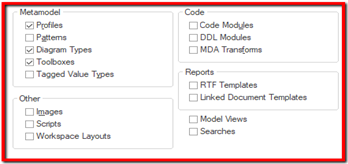
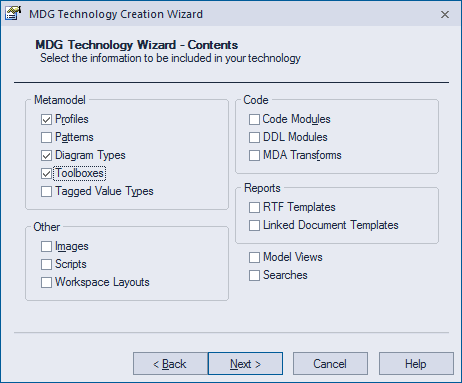
5. Select the checkbox for each item to be included in the MDG Technology file. When you have selected the checkboxes for all the items you want to include, click on the Next button.Each selection runs specific dialogues to enable the definition of the specific items to be included in the MDG Technology.
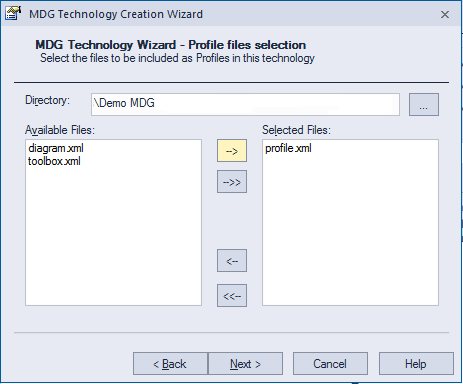
6. Locate Profile xml. which was created for each package (profile, diagram and toolbox) and it will display all the UML profiles under the selected folder and it that need to select the profile UML alone
- And similarly need to select the profiles for the toolbox and diagram
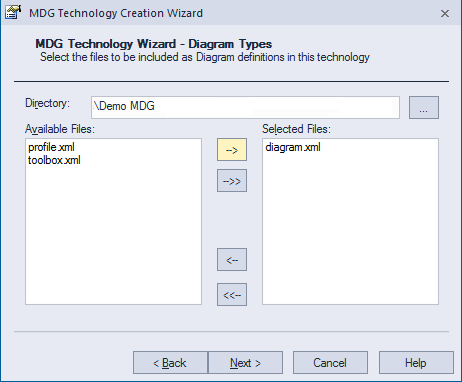
7. Locate diagram xml. select the needed definition and select Next.
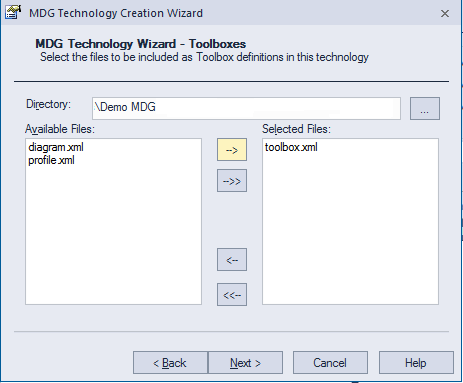
8. Locate Toolbox xml. select the needed definition and select Next.
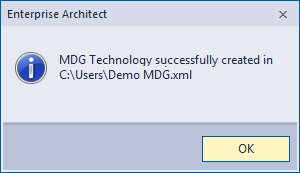
9. Select Next and Finish.
10. MDG Technology successfully created.
To Import MDG Technology
- From Ribbon , Public Tab -> Publish ( Resource Section ) -> Import MDG Technology.
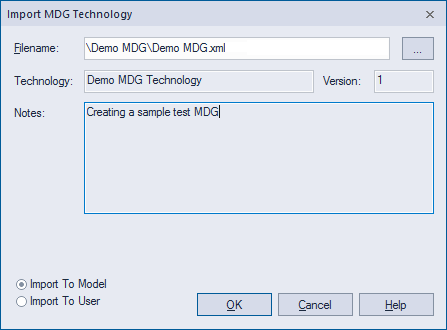
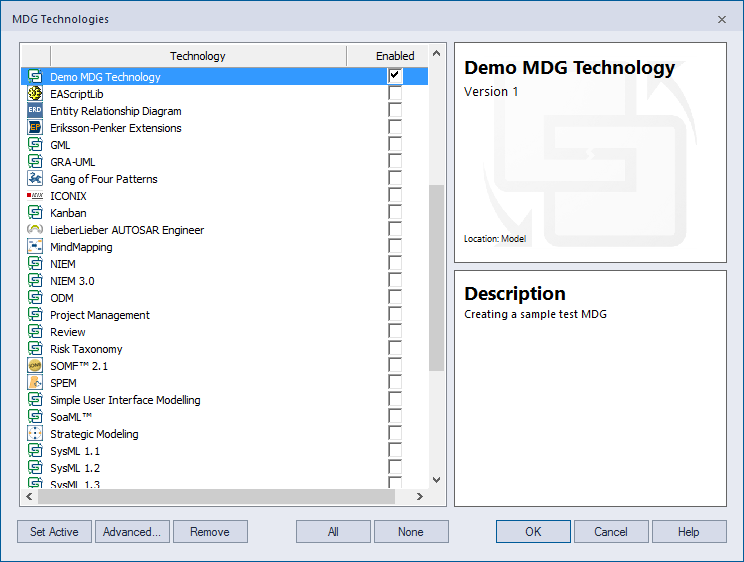
- Once imported, the added technology will be displayed in MDG Technologies.
- Go to Configure ->Manage ( Technology section ).
To Update MDG Toolbox
- Do Changes in the MDG Profile .eap file and regenerate all the steps defined in “Generate MDG Technology”
- When creating an MDG file in the final step instead of Creating a New MTS file need to choose Open an existing MTS file and need to select the existing MTS file and update the information in it. For each update in MDG, it’s good to update the version of it.
Further Information
Please contact us or write an email to info@sparxsystems.in to have a live demo of the new EA 16 features and capabilities.